Mic stand hammocks available direct from us for a limited time only. Note: Hammocks only suitable for system techs/engineers under 12 and under 20kgs.
You’re In Safe Hands
You’ve read the previous Techblog all about making your life easier by choosing redundancy, right? Taking the weight off, by getting something to do the monitoring of your precious feeds and switch in some backup plan if something screws up?
Well, as you might have gathered, we have got this covered for you, and not just once, but three times!
Let me introduce you to the MX36. The MX36 will look after all your signal redundancy needs, and for sets of four channels, not only for stereo pairs. So, your Left-Right-Sub-Fill mixes can be hooked up to this handy processor, on Dante, AES and analogue all at the same time. Without needing to connect a PC, or an iPad, you can set-up how you want to use the redundancy direct from the front panel with two simple button presses, and then leave it in charge.
The MX36 – the solution to all your console switching needs, and then some!
Big Green Rings
This in itself could be a bacon-saver, but the MX36’s modus operandi isn’t actually the redundancy aspect – it’s all about the three big green rings. Let us explain – have a quick look at the rear panel…there’s a lot going on:
All those sockets on the rear of the MX36…
That arsenal of connectivity should give you a clue as to what the MX36 is all about – it’s designed to switch up to three x four channels from your consoles to feed the upstream processor or amplifiers, allowing for quick and easy management of the desks. It’s also designed to output these in all three formats – so you get a set of four analogue outputs, a set of 2 stereo AES outputs (with external wordclock sync if you need it) and four transmitter outputs on the Dante network, all simultaneously with no set-up required.
If you can’t use the redundancy aspect of things, just turn it off – one button press per A/B/C set of channels sorts this out. Or, if your main act want that extra safety net, have it running on one set, and not on the others – it’s totally flexible and instant to configure.
Always Listening, Always Checking
As if that wasn’t enough, every single line that connects to the MX36 can be individually confidence checked via a high power headphone monitor section. Look at this diagram – everywhere you see the green “headphone” graphic is a group of monitoring points:
Every single input and output, and lots of points in between, can be monitored via the front panel phones amp.
This means that you can check each individual channel in your Dante streams, each half of any AES stream, and every analogue input one at a time. There is also a high resolution meter that allows you to check levels accurately, and you can even listen to your local mic input and the stereo background music input should you need to. That’s pretty comprehensive!
So those big green rings from earlier – these are the three most important buttons on the panel – the three buttons that switch between your three consoles:
Switching consoles as easy as A-B-C…
There’s a subtle cross-fade, performed by the DSP, to avoid any nasty surprises, and more than one console’s L-R-FF-Sub set can be active at any time, should you prefer to cross fade instead of fade out and back in. And yet there’s more functionality…!
VoG + BGM
128k mp3 anyone? Not even our pristine 24-bit ADC can polish that one…
As if this wasn’t enough, there’s also scope to include those extra little features that just make things easier and don’t waste channels elsewhere – a fully featured mic-preamp with 48v phantom power, sweetening EQ and compressor (all preset for best results), and a stereo line input for plugging in your BGM source. The mic input is on the front AND the back, and the stereo input is a mini-jack on the front and “proper” balanced XLRs on the back. Where these inputs are routed is quickly set up via a couple of front panel buttons again, and we’ve even programmed in the most useful combos of routing options to your choices for the mic, so you don’t have to switch through all possible choices.
You can monitor the audio before you commit to putting it out there, and it is also bussed out on Dante to cascade to bigger systems.
Did We Mention Expansion Yet?
And maybe we won’t for now. Someone will always want more inputs, or the ability to handle more than 3 consoles, so with the connection of a Dante cable, all of this becomes possible, including monitoring across more than one unit, and doubling up on the stereo BGM and VoG mic inputs. If you want to read all about how that works – check it out here.
You Deserve A Break…
We really did design the MX36 to make like easier for you. No longer will you have to press into service a box full of DSP that’s not designed for the job and have to spend ages designing a workable solution. Gone is the need to hook up a computer and navigate a host of pages just to mute and unmute some channels. And best of all, the MX36 will accept the most popular audio formats so you are guaranteed to have at least one easy connection method to every console. If you’ve more than one, then protect your connections with the redundancy features.
Now crack open a beer, read the brochure and have a rest in that hammock. Actually maybe not THAT hammock!
If you’ve ever faced the nightmare scenario of a gig plunging into silence mid-way through, or even had the audience all glaring at you due to a sudden outbreak of snap, crackle and pop (which of course is totally always your fault!) then you need to read on…
No matter how much you like cereal, no-one needs to hear it.
In these thoroughly modern times, with more and more audio being transported from stage to FOH and on to amps and processors digitally, we all appreciate that most times with digital it’s all or nothing. Either you’ve got your audio (and that could be ALL your feeds from the stagebox), or…nothing. No losing a phase of one line in the multi, and an overhead drum mike being a bit quieter than expected, no little bit of noise on a few channels as you’ve some power cables running a bit close. Nothing.
Use CUTTERS! This photo makes me anxious on several levels…
All it could take is someone changing sample rate on an AES stream – your master L-R AES stream to the processors and amps and at best there’s a glitch, at worst – dreaded silence again.
So what’s to be done, apart from the obvious check and double-check all cables, connectors and put mittens on the rest of occupants of your FOH cave?
Time for an intervention.
Employ some redundancy. Fire all non-essential staff. Not that kind of redundancy – the kind that actually looks after things and fixes things automatically if there’s a problem.
It’s not a new idea in the field of professional audio, not since AES was introduced on digital equipment, but often it could not be implemented as the assumption was that if you were using a digital source, why would you need to concurrently support same analogue source? So, switching to digital inputs would often use the same XLR sockets as the analogue. Most times, this is fine, but if you did want to have the ability to switch back to analogue in an emergency, then you’re repatching in the back o f a rack on the fly, not flicking a switch – not ideal as the silence descends, threatening to envelope and consume you in its silky folds. Too dramatic?
So imagine if all the sockets to connect up your precious L-R audio were available for both analogue an digital simultaneously, and you could switch between them really quickly in case your AES feed died and you had also plumbed in your pair of analogue ties as…REDUNDANCY!
Wouldn’t that be really useful?
Take a load off.
Now, imagine that this switchover could be done automatically for you – if the AES goes off, analogue is quickly and quietly selected and the music continues to play. So that’s automatic failover.
Handy eh?
So…what about when the stakes are even higher – not just your L-R audio, but perhaps multichannel network audio, coming down a Cat5?
Let’s get specific and consider Dante is this network. Dante is a marvellous method of funnelling and transporting a frankly quite terrifying number of bidirectional audio channels around on a network infrastructure never originally designed for much beyond moving documents and spreadsheets. That said, no-one considered that you’d be able to send ultra HD video down a computer cable either, so let’s just wonder at the wonder and leave it at that!
Audinate, the people behind Dante, were completely aware of the very real-world pitfalls of computer networks – IT departments don’t exist for no reason. If you’ve ever looked at the Enthernet ports on any audio equipment that supports Dante, there’re almost always two sockets. [These aren’t IN and OUT – if you think they are, please go here and ask yourself if this is a better use of your time.] – I know they sort of can be thought of as IN and OUT when you are using a Dante module in “switched” mode and not “redundancy” mode, but we’re not doing that, are we?!
They are often labelled 1& 2 or Primary and Secondary, as Dante supports a level of redundancy in an attempt to circumvent the (pretty catastrophic) loss of all audio that would result from the network going down. Remember, this might not be a dodgy cable or someone tripping over something – it could be a router crashing, someone plugging in a laptop to the network and streaming the Lion King in UHD – there are a host of things that could cause an issue and with that “all or nothing” idea ringing in your ears, there could be a whole lot to lose. Too dramatic again?!
We aren’t suggesting that routers often spontaneously burst into flames, but then you wouldn’t have thought mobile phones would either!
Dance, while the music still plays on…
In the same way as redundant PSUs on a console’s supply aren’t going to help you out much if they’re just plugged into the same distro, should the mains fail, to really make use of the network level redundancy, you’ll need to have two independantly routed networks set up, via different routers and switches, not just two cables plugged into the ports (although this better than nothing!).
If you’ve not got the ability to set this up, then running the AES feeds (and analogue versions for full belt and braces) would mean things have to have gone really t*ts up, and you’re covered – you can lose the Dante network, the AES can fail and you’re still playing on!
Warning – this TechBlog post contains images that some readers may find offensive.
How does this photo make you feel?
A little ill? A bit angry? Perhaps quite sad?
Maybe a combination of all three? Here at XTA, seeing that sort of mess makes us want to get out the Velcro cable ties and the labelling machine and sort that sh*t out! Imagine something becoming unplugged in that disaster-in-waiting, and having to try and fault-find. Apart from the confusion, and lack of organisation, imagine the time wasted in trying to get things working again when this inevitably screws up.
It’s the sort of thing that could come back to bite you when the pressure is on to explain why the network has stopped working, or, in our case – what the sound has stopped coming out of the speakers. Now there’s network audio as an element in the equation, this kind scenario is no longer consigned to just IT systems…your audio can be part of the IT system!
Now, just to make you feel better, stare at this photo instead for a few seconds and take some deep breaths as we have some very reassuring news for you.
Feeling calmer? To be fair, extracting something from one of those lovely bundles would be heartbreaking, but let’s focus on that almost “sci-fi robot backbone” look of this lot and stare in awe and wonder.
You just know that whoever has installed this lot has a “belt and braces” approach to their cabling and infrastructure. If something goes wrong here, there’s going to be some sort of failover mechanism that kicks in, ensuring uninterrupted service and subtly alerting you to its intervention to keep things working, and keep you in a job 😉
And that sort of system is now available in our amps. For free.
Failover, Redundancy – aren’t they the same thing?
Yes – in essence they are. They are different names for anything that acts automatically as a backup to ensure the integrity of a system or a signal path is maintained in the case of a failure. This could be PSU redundancy – and catered for by having two independant supplies on different circuits so if either suffers a power cut (perhaps through someone tripping over a cable, or even cutting a cable), the other can just keep things running. It might be a UPS on a computer system where the secondary supply is backup batteries.
In our case, it’s a triple level system that allows you to use all three input sources at the same time on your amplifier to provide three layers of safety for your precious audio signals. The amplifier isn’t just blindly (of “deafly”, if you like) processing incoming audio from your chosen source, with no backup plan.
It’s also aware of how that audio works and what will mean a loss of signal. So, it’s checking your Dante signal not only for it being there (so is there a cable plugged in) but also that there are streams routed to the amplifier. If someone inadvertently unsubscribes any channel than your amp knows and can swap to a different source, be that AES or analogue (or even another Dante stream). The AES signals are also constantly monitored for presence and if they disappear, again, your amp can switch to another source.
Backup-Restore-backup-Restore…
What you choose as your primary and secondary sources is fully programmable – if your desk has AES outputs then this would probably be your primary source. Analogue is always seen as your final choice/source as it’s the one that can’t be checked for integrity (and before you all jump on that and mention pilot tones, we are thinking of non-installation scenarios). So what if your primary source is restored – do you want it back, or do you want to assume it’s unreliable for now and try to find out the cause of the failure?
You choose. You decide how long to wait before the arrows swap direction and your amp tries again with the secondary or primary source, or decide not to swap back at all unless you do it manually.
Your amplifier will let you know that the source has changed through use of the Network Audio and AES In LEDs – if they are flashing then you’ve lost a source and are running on a backup. The input sources will also have updated on the screen showing displayed when the IN-A-D bank is selected. You can control all of this from the front panel, or set it all up remotely in AudioCore. It’s also stored as part of a “Source” memory (or of course part of an “Everything” memory).
If you’re going for the full “belt and braces and string” approach, you’ll obviously need to be able to provide your audio in three forms – Network, AES and analogue. There’s nothing to stop you from feeding different signals into the sources and setting the amp up to switch sources when they are present, like a monitor or TV will do with HDMI/VGA and analogue….
Find out more about how this all works in DPA and MC2 Delta DSP amps by downloading the TechNote here!
Now, save yourself from the embarrassment of unexpected silence and run those few extra cables, but do it neatly and use some of these:
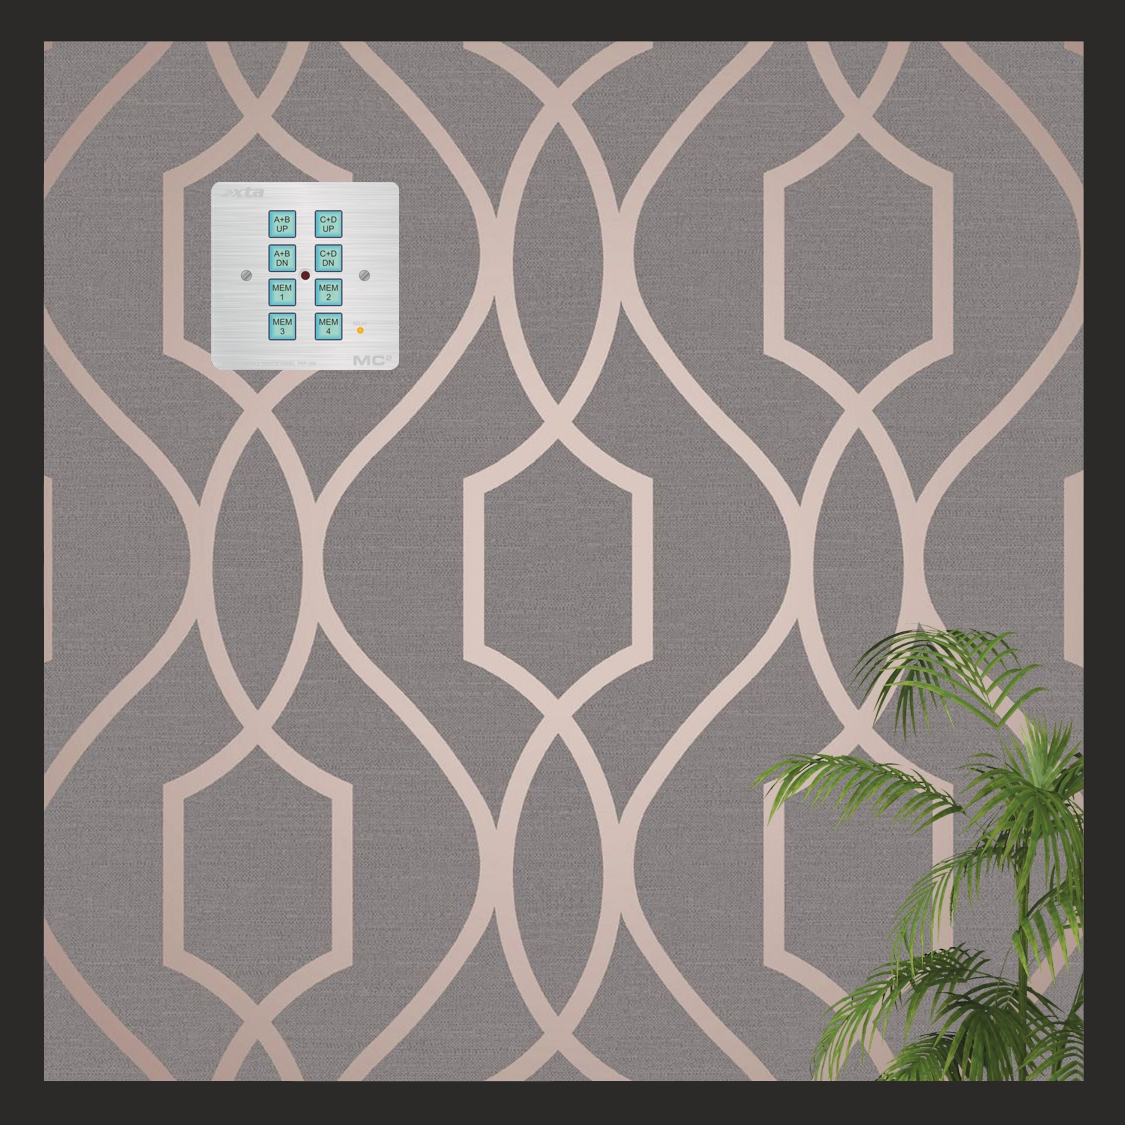
The DPanel-8 is a stand-alone remote panel, operating using the RS485 bus for comms and using either the GPIO port of an MC2 Delta DSP amplifier or XTA DPA amplifier, or an external 5V source for a power supply.
The DPanel-8 is also fitted with an isolated SPDT relay to control external equipment such as projector screens or blind/drape motor systems.
It may be programmed “in situ” whilst plugged into Delta or DPA amplifier, or may be connected directly to a PC (via a suitable RS485 adapter) for programming. It uses the “simple remote protocol” embedded in the firmware of all Delta DSP or DPA amplifiers and all 4 or 5 Series XTA products, as well as the DC1048 and Ti1048 installation management systems. Multiple panels may be connected to a system, and the panels can coexist with AudioCore connected via Ethernet or USB.
Capabilities of the DPanel-8
The eight buttons on the panel can be programmed to operate in three “key modes”:
1) Momentary (used for gain adjustments)
2) Toggle (used for mutes and standby)
3) Interlock (used for memory recall)
The “simple remote protocol” allows control of the following functions of an amplifier or processor:
1) Gain set (absolute setting of any input or output channel’s gain value)
2) Gain inc/dec (adjust gain in programmable steps relative to current setting, with max/min range capping)
3) Mute (any input or output or combination)
4) System mute (all outputs muted when enabled, restored to original settings when disabled)
5) Standby (amplifiers only)
6) Memory recall (currently this is only for “Everything” type memories on all amplifiers or processors to ensure compatibility
7) Relay on/off (isolated relay control on DPanel)
Multiple commands to different devices can be programmed as a macro assigned to a single button.
The DPanel-8 also has an IR sensor and is compatible with many generic IR remote controls, and additional features may be programmed using the IR Remote to extend the capabilities of the panel, or it may be used to replicate the buttons’ functions, on a button-by-button basis. The panel may also be locked to prevent unwanted tampering (including/excluding IR access).
The buttons feature removable caps and are backlit with programmable colour options (cyan/red/magenta) so may be labelled according to their function. The panel also features additional background illumination for use in low light environments. The brightness of the backlighting and buttons is also user programmable and the backlighting may be disabled if required.
The panel is designed to fit into a UK single pattress box and may be either surface mounted or embedded into a wall. The front face is silver brushed 3mm aluminium to blend into any décor.
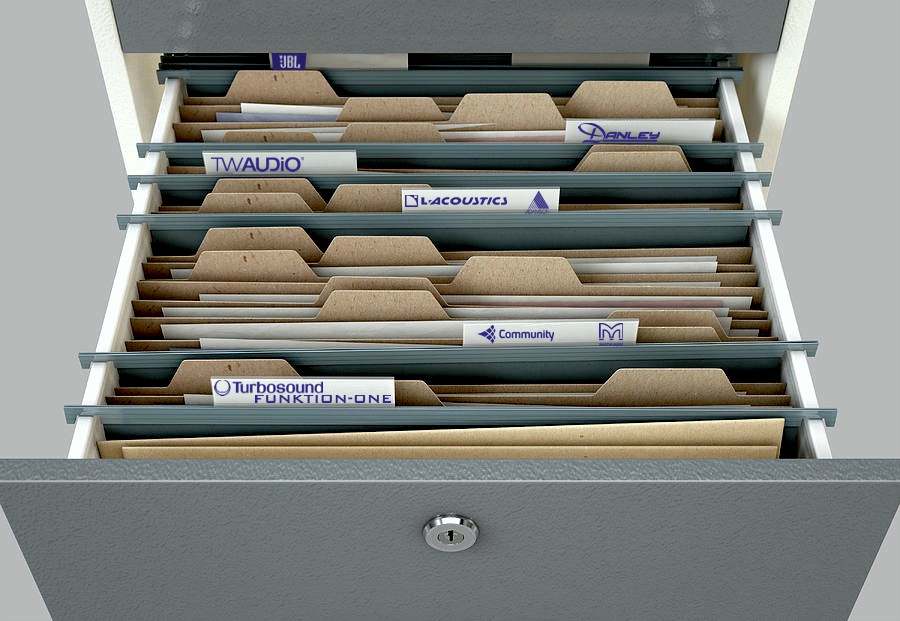
Collaborating with the best speaker manufacturers has always been central to XTA’s modus operandi. We’ve created many OEM versions of our speaker processors over the years, going all the way back to the DP200, in the guise of the MX8600 for EAW, through a host of DP226 OEM units, such as Martin Audio’s DX1, Turbosound’s LMS-D6, Funktion One’s XO1, Quested, Celestion, Tannoy….the list goes on.
Actually quite hard to find a photo of the MX8600 – they are still in use and that’s over 20 years ago!
The 4 Series have received similar endorsement over the years, appearing in many guises, including some noteable manufacturers such as DAS Audio, Proel, Qube, and continued support from other big players in the form of presets issued for direct use with our own 4 Series – L-Acoustics and JBL amongst others.
The great news is that this symbiotic relationship continues with our latest processing amplifiers, with some manufacturers choosing to rebadge the models directly and load with their own presets, with others supporting their systems with presets that can now be loaded like never before through AudioCore: Amped Edition.
The very fetching Funktion One D-Series – our DPA and DNA Series.
Any preset, any amp…
The only problem with the presets for 4 Series and earlier product was that a “preset” meant a complete set of output channels with routing, and so obviously a preset for a 448, whilst technically it should work in a 426, wasn’t compatible. Maintaining a library of all versions for all models was a time-consuming process.
To get around these problems, and make presets work everywhere, we have, in collaboration with a host of speaker manufacturers, developed a library of over 1500 presets that don’t need to know what model they are destined for, as they are loaded through AudioCore : Amped Edition and will work with all our processed amplifiers!
That includes APA (4-E6 and 4-E8), DPA40, DPA80, DPA100, as well as MC2 Delta 40, 80 and 100.
Jason Kelly, our EMEA Technical Sales manager, explains a little more on how the presets were compiled.
“The system is designed to work on an ‘enclosure’ basis – that’s to say, they don’t have to be 4 or 8 channels – they could be a single channel’s worth of data if it’s a sub, or a full range cabinet. Loading into an amp is as simple as a right click on the first channel to drop the preset in, and then search the library. There’s plenty of meta data explaining way more than just the name – you get info on how many channel’s worth are needed, notes from the manufacturer, if it’s going to bridge any channels, and so on. There may be FIR filter data included, and security to keep the most important settings sounding as they should.”
How does is work?
Loading though AudioCore allows for total freedom when it comes to how a preset is configured. You get to choose where the preset is loaded, and if you want to mix and match different systems subs and tops, it’s in your hands. All you have to do is make sure you configure the routing yourself, and you’re guaranteed that the settings chosen will be showing off your speakers to the best of their ability.
Presets can be loaded into either amp outputs or auxes (on DPA and Delta DSP amps) and if amp channels are in groups. you’ll soon be able to propogate the settings directly to other amps in the group without having to repeat the process (based on channels in absolute groups of course!).
Can I check for my system’s presets?
Yes of course! You don’t even have to download and install AudioCore : Amped Edition to do this. It’s really easy – Click here to take you to a page were you can download a searchable database, or a plain and simple pdf to check on your phone – be aware it’s 37 pages of presets though – it’s a massive library!
If you’re not included in the current library , don’t despair – there’s also a direct contact form so we can email you back and try and get you involved. The vast majority of our presets were produced in collaboration with the speaker manufacturers, so you can be assured that the settings are accurate and will make every system sound its best, especially with our amplification and processing behind it.
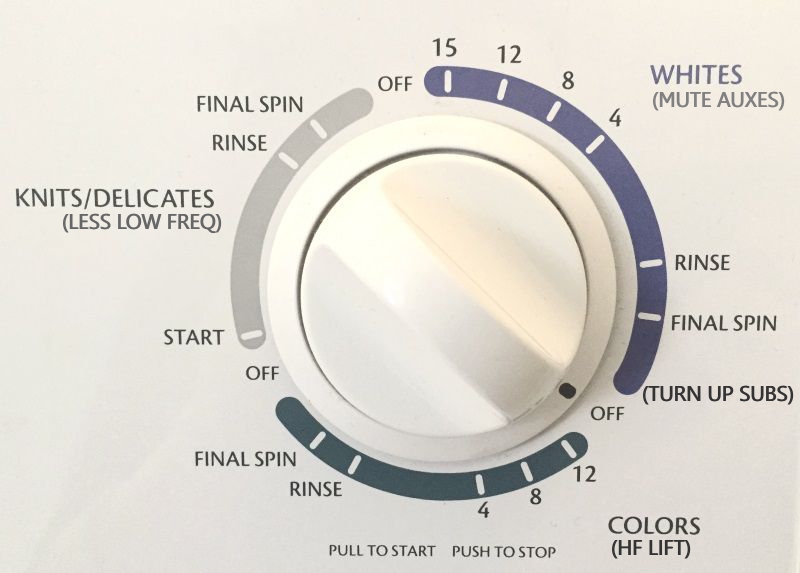
Sometimes there’s nothing better than a big knob. Or a big switch. Turn the dial, or press the button. Alexa, Siri, Google Home? Or just reach out and physically adjust a real control. Whilst voice control feels very sci-fi and possibly has its place for internet searches and complex remote control, is it really more convenient to have to say “Alexa, change the TV channel to BBC2” or “Alexa, turn on the living room lights” than just picking up your TV remote and pressing the button, or getting up from your chair and flicking the switch on the wall? Most of us don’t live in mansions so the walk isn’t so far…!
Anyway – let’s get back to the topic – knobs and switches…DPA (and Delta) amplifiers have just got simpler with a great functionality update – the general purpose input/output port is now active! This means a multitude of remote options are now literally at your fingertips via the connection of the most basic remote hardware – some switches and some potentiometers.
What can I do?
There are a variety of things that can be controlled via the GPIO port:
1) Standby – simplest of all – connect a switch, switch the amp off. Switch it back on.
2) Mutes – again – kept simple, but a little flexibility – connect a switch and set a system mute (all outputs – original setting restored when turned off), OR set an alarm mute (inputs A,B&C muted – leaving D open for emergency evac. use).
3) Volume control – VCA mode allows pairs of inputs to be turned up and down (A&B, C&D, or all four together).
4) Switch settings – in other words, recall a memory – a simple switch can swap between to set-ups; a rotary selector can switch between one of eight memories.
This 6-pin mini-Phoenix port will unlock your most basic remote needs. That sounds a little dirty.
How do I choose?
Simple – there’s a list of preset configurations to choose from in the GPIO Interface menu – there are two inputs that can be used, and the most useful combinations of options are listed for you to select which works best for you – for example VCA control of inputs A&B on one port, and standby control on the other, or perhaps just two scene changes on one port and system mute on the other.
One control, many amps…
The input side of things has another trick up its sleeve – remote relay of the commands via the RS485 bus. See? It’s STILL got a use 😉
Changes using the GP inputs can be sent as a command to other DPA amplifiers to make them do the same thing – the interface on the other amps will need to be set to either “RS485 only” mode, or if Ethernet control is being used, the RS485 sub-mode will need to be set to “Simple” as these remote messages use the simple remote protocol (see the TechNote on the SRP update here).
Assuming the amps have a connection via their RS485 ports, any changes will now happen to them as well.
Choose which GPI port controls are relayed when setting up the GPI modes.
GPI RS485 Relay comes after the choice of operating modes… (Delta Series DSP amplifier shown)
GP Outputs as well as Inputs…
The observant among you will have noticed this is called a “GPIO” port.
The “O” stands for “Ocelot” of course.
OK, so it doesn’t – it stands for “Output”, and apart from having the same number of letters and and starting with “o” and ending with “t”, there the similarity ends. The output pins on the port are fixed in their operation and can signal if the amplifier is in “protect”, or if it has been switched into standby – so basically flag up if anything would stop it playing music.
And finally – how to connect and use the GPIO Port
This is what you came for. First firmware version to support the GPIO functionality is 1.29 across all DPA and Delta DSP amplifiers.
There is an updated manual appendix that covers all the set-up info and has lots of useful examples of how to connect switches, pots, LEDs and relays to the port, and this info is also available as a TechNote here.
This post immediately wins the award for the driest title ever in the history of the the TechBlog.
It could also win the award for The Most Useful TechBlog You Ever Read.
In either case, it’s a cracker, so with that alternate click-bait title in mind, please read on…
What is a “Woohoo” and why do I need to know?
The crucial method that all DPA, Delta and APA amplifiers use to alert the network (Ethernet connection only) of their presence is the “Woohoo” message. It’s not a cocktail either.
Back in the old days…
Using a serial connection, such as on 4 or 5 Series, or even when using USB or RS485 on the amps, units are detected by a request/response system – that is, a message is transmitted from the PC etc. on each ID asking “Is anything there?” A timer is started to wait for a short period for something/anything to reply and say “Yes! I am here!” and then the ID number is incremented and the request is transmitted again.
And so this continues through all the ID numbers and at the end of the process we know how many devices have been discovered, assuming no-one has accidentally set two to the same ID. In that case, probably only one will be seen, and when it comes to actually requesting settings back from them “both”, there will be all sorts of problems as they both try to talk over each other.
This process is reliable, on the whole, but given the restraints of serial data speeds, and the need to pause between each request, it can take quite a while to check the entire ID/address space (64 devices) and will vary with baud rate (slower baud rate means longer wait). Some years ago, we added one tiny feature to original AudioCore to help with this – the “Skip Rest” button. If you only have a few devices and have sensibly set them to sequential lowest IDs, there’s no need to go on checking all the others once they’ve been found.
There are better methods that can speed this process up such as TDM (time division multiplexing) and this is how the USB and RS485 is now handled in AudioCore:Amped Edition for serial comms discovery, but that’s beyond the scope and intent of this post so imagine you’ve pressed the “Skip Rest” button and moved on…
In the modern world of computers…
You hang up…no, YOU hang up.
…everything is connected. And everything is on the Internet. And quite possibly, nothing works any better! Inevitably there’s a price to be paid for everything existing in the same data and communications space, and we quickly forget how immediate the control and response of isolated systems has almost always been sacrificed in the pursuit of the convenience of simpler connections. Remember how quick you used to be able to change TV channels, before freeview or digital TV? Ever ended up skipping ahead using your TV remote because the channels just don’t keep up? Remember back to analogue phones when you picked up the receiver and you could both hear each other immediately? Notice now how you will not be sure you’re connected or that you’ve hung up your mobile call correctly and have to double check? All of that ranting is to precursor the concept that, even though there are no baud rates to set, no COM ports to select, no adapters to use, the use of an Ethernet connection is not without its own set of potential problems!
The process of being recognised on a Ethernet/IP based system works differently. Instead of a request/response system, which, given the way devices are addressed with 32 bit addresses (TCP V4), this gives over 4 billion possible requests. Given that sort of potential range, theoretically you could be waiting somewhere in the region of 32 YEARS to check the lot.*
So, instead, when an amplifier is connected to a network, it will begin to broadcast a short message to say it’s there, every three seconds or so – its “Woohoo” message. This is sent out as a UDP type message as opposed to a TCP type message – you don’t need to know much more about that right now – UDP is basically a less complex method of getting your voice heard without getting bogged down in protocols, error checking and handshaking – you can read more here if you’re a glutton for detail.
When you start AudioCore, it uses two processes to work out what is out there, happening while the splash screen is being displayed. Depending on the connection settings (Comms menu in AudioCore) it will either be listening out for UDP “Woohoo” messages from amps, and/or the traditional (albeit updated TDM version) “are you there” request and response. As a side note – to speed up the initial scan, if you only using an Ethernet connection, select this as the connection setting so every time you start AudioCore it only searches this way.
Select “IP Connection Only” if all your amps are on Ethernet for faster start-up.
What if you switch on all your amps together, and they all start broadcasting at the same time? aren’t the “Woohoo” messages just going to clash, like they would if two units are on the same ID? Well, yes, and no…There is the potential for them to overlap, and if this happens and a collision is detected, some clever protocol and negotiating takes place within the Ethernet controllers to adjust the timings and prevent this happening repeatedly. Also, as the amps also have to request their IP addresses from the DHCP server (hopefully running somewhere on your network, probably in your router), these addresses will be doled out sequentially so this in process in itself introduces random useful delays preventing the “Woohoo”s from happening on top of each other.
Let’s just look at the end of that last sentence…”preventing the “Woohoo”s from happening on top of each other.” A pinnacle of TechBlog, right there.
Everything’s Safe and Sound
Assuming all the amplifiers on the network are set to different IDs, have Ethernet selected as their Interface type, and are physically connected to the network on their control port, then in most circumstances, discovering them in AudioCore should be seamless. However, as everyone who has ever worked with computers knows, assumption is the mother of all…let’s say screw-ups.
All amps found successfully – start from scratch, download, upload…
Hang On – No It’s Not…
But what if you only see 5 units, when you know there are 6? There are the obvious things to check first…
1) Is the amp powered up? I know that sounds very patronising, but remember, in the case of APA amps – the screen and meters will OFF when the amp is in standby so there’s not much to show you that power is applied – is the power button lit OK? All amps can be detected whilst they’re in standby of course…
2) Is the Ethernet connection OK? Again – obvious stuff, but we all know those cables have fragile locking tabs, and they can fall out a lot easier than they really should if the tab is broken or missing. For APA the network LED below the LCD will be illuminated if all is well. Check cables, and that you’re in the correct socket – if you’ve Dante fitted, there are three to feel for if you’re doing this blind, and two of these are for network audio only!
3) Have you selected the correct interface type? APA is a no-brainer – it’s Ethernet or nothing. Delta and DPA though, you’re a lot more choice. They need to have their External Interface Mode set to either “Ethernet Only” OR “Ethernet or USB”. In the case of “Ethernet or USB”, make sure you’ve not got a USB cable plugged into the unit at the same time [or at least the other end of it’s not connected to a computer] as USB takes precedence over Ethernet so you’ll only ever see this amp [actually, you could see the rest if they’re on an RS485 relay but we are assuming they’re not or you’d not be having this problem!]
Something Else Is Wrong!
Things are getting serious now. If you have a unit missing, or you see this in AudioCore:
System Change Detected. Rescan System. Erm…
Check your Ethernet settings – start if at all possible, and unless you’ve a good reason not to – with RS485 Relay OFF, Remote ID as low possible – or sequential from 1 if a lot of amps on the system, and make sure you’ve not selected an ID with “s” after the number – these are “shadow” IDs are will not respond in this configuration. Set IP Mode to DHCP/Auto and IP Speed to Auto.
In a big system or if you’ve not got all the amps nearby, this can be a bit of a time consuming process, so here’s where the IP scanner comes into its own. Download the IP scanner here. It’s a zipped up exe file so just unzip it and run it. There’s no install – it’s very quick.
You’ll probably be intercepted the first time you run it and asked about security for access to networks – always grant permission – as if you don’t it won’t work and the process of getting this one-time decision reversed is a bit tedious.
All that Woohoo-ing captured…
Make sure AudioCore is OFFLINE, or CLOSED. Once amplifiers have been detected in AudioCore, they stop broadcasting their “Woohoo” messages. The left hand pane shows all the network adaptors found on the computer. This will include Wifi adaptors and Bluetooth in some cases. Bluetooth is obviously not important, but in case you’ve got Wifi and a wired network running at the same time, any amps on Wifi should show up as well.
The top pane on the left hand side updates in real time as “Woohoo” messages are received, and the coloured blocks denote what network they have been received on. Unless you are doing something particularly clever with amplifiers on different physical networks, you should see everything in one colour.
The bottom pane on the left hand side will populate with the list of all units that have been discovered – the total is shown just above this – quicker than having to count the list if it’s long.
Spot The Mistake…
If there are units missing in AudioCore and they show up in the IP Scanner, check the settings carefully – chances are they are accidentally set to Static IP address instead of “DHCP/Auto” – check out the Delta 80 on ID1 above and look at its IP address, compared to all the others.
Make sure all IP addresses fall within the same address range – so not like this…
Notice how they all start 192:168:16:??? Notice how the Delta 80’s is different – 169:254:5:1? An address starting 169:254…is normally an auto generated address that the unit comes up with if it can’t connect to an DHCP server, or if it’s set to static IP. Set IP Mode to “DHCP/Auto” via the front panel of the amp in question and restart the IP scan.
What Else Could Go Wrong?
As with older units which worked over serial comms, there’s still an ID number to contend with and setting this incorrectly can cause problems that can seem obscure within AudioCore. Make sure all the ID numbers retrieved using the scanner are different – any set the same will cause AudioCore to behave unpredictably – the amps will be detected, but the retrieval of their settings will not work.
Choose Your Network Adapter in AudioCore Too…
Press the “Select Adaptor” button when you go online to change to the right one (and minimise scanning Wifi or other wired networks unnecessarily).
The caption on that screenshot basically tells you what to do. Much as the IP Scanner shows you all the possible networks, this selector window allows the choice to be made of which networks are to be scanned. You’ll notice that the IP address of the adapter will match the IP address range of the units found using the scanner (in this case the 192:168:16:NNN) so it’s easy to work out which one to use.
And Finally – System Monitor
So many people don’t realise how useful this is!
Make System Monitor your friend! This often ignored tool in AudioCore shows at a glance that all amps are connected and happy – a big red cross will replace the metering of any amps that are not playing ball. Clicking on any amp’s meters will open it for editing, straight to Gains. Drop back to the System Monitor with the button that will appear on the editing window.
If you’ve still got comms problems, maybe now is the time to give us a call – preferably on a landline, although we have recently switched to a VOIP phone system. Sometimes it works, sometimes it doesn’t!
*approx 4,000,000,000 addresses, approx 4 can be checked/second at 115k serial speed, giving 1,000,000,000/second which is just shy of 32 years, give or take…
As if control from the front panel, from a laptop on USB, or Ethernet, or WiFi, or RS485, OR via DeltaDirect on an iPad wasn’t enough – what if you want to go back to basics?
What if all of that is just too advanced or clever to expect your bar staff or venue owner to cope with?
What if you don’t WANT to let them get into the nuts and bolts of your carefully commissioned and tuned system configuration?
Well, this might just be the answer…
Control of the Important Stuff
Some of you may be aware of the simple remote protocol that is implemented in 4 Series, 5 Series and 1048 processors – a basic set of commands without error checking and complex headers to enable control of day to day adjustments – input and output gains, mutes, memory recalls…
This works on the RS232 and RS485 ports and is in addition to full remote protocol that AudioCore uses for full two-way control and monitoring.
The simple remote protocol (or SRP as it will be called from now on, or FNO), is one way only (so no settings can be retrieved from the connected unit/units) and allows the following settings to be changed:
– Mutes: individual inputs or outputs
– Absolute gains: individual inputs or outputs
– Memory recalls: depending on how settings are stored these can be input EQ, output EQ, sources (DPA/Delta only) or other processing combinations
– Gain increment/decrement: adjust individual gains in programmable steps, relative to the unit/units preset gain value (volatile – restored to original values on a power cycle)
There is still scope with each message to address individual units (by model) and also individual device IDs, but there are also global addresses for broadcasting to, for example, all 4 Series, or all DPA amplifiers, and to use a global ID address.
Play the Eagles again. Or something else modern…
Firmware Support
The latest firmware release for DPA and Delta DSP amplifiers to support the SRP, is 1.26, and this release also incorporates a slight change to the Interface Sub-Menu to accommodate this. As the only option for using the SRP on these devices is via the RS485 port, this needs to be selected as the comms method of choice. However, the majority of systems will most likely not be using RS485 as the main comms method – the likelihood is either USB or Ethernet will be in use.
The DPA and Delta DSP amps already have an option to enable RS485 relay mode when using USB or Ethernet as the primary comms method, but the purpose of this is to enable a single point of Ethernet connection to allow multiple amplifiers to be controlled by daisy chaining them on an RS485 “spur” like this:
Ethernet + RS485 relay creating a “spur” of connected amplifiers.
In this scenario, you might think the RS485 being active would allow any commands sent through this port to be interpreted and acted upon. Due to the complexity of “tunneling” the RS485 data from the Ethernet (or USB) connection, this mode of operation isn’t possible. However, it is now possible to configure the RS485 port, even when using USB or Ethernet as the main connection, in a mode to enable asynchronous “listening” for simple remote protocol commands.
When using Ethernet, USB, or “Ethernet or USB”, the RS485 Relay option offered in the configuration now has two settings, aside from “OFF”. The “Relay” option is the same as before and should be used for scenarios as above, where one or more units are to be daisy-chained from the RS485 port of the master unit, for remote control via from AudioCore.
The new “Simple” setting enables the RS485 port to listen for SRP commands, so basic control when off-line can still be active.
AudioCore + SRP via RS485
If all units are to be seen by AudioCore and controllable via RS485 SRP as well, then all units need a direct Ethernet connection in addition to their RS485 bus connections to the wall panel. Each unit is set to “Ethernet Only” with RS485 Relay set to “Simple” as below:
Ethernet to each amp + RS485 in Simple Mode for SRP control
Simple IS Simple, NOT Relay
As explained above, the “Simple” mode in RS485 Relay means that units daisy-chained on RS485 cannot be seen in AudioCore, set in “RS485 Only” mode as in the above “Spur” scenario. In the scenario below – only the first unit will be seen by AudioCore as it is in RS485 “Simple Mode” to allow it to respond to the SRP as well as Ethernet traffic.
Simply adding a control panel to the RS485 bus and setting the first device to RS485 Simple Mode will NOT work – only device #1 will be seen by AudioCore.
It is also worth noting that using AudioCore at the same time as issuing remote control commands from a wall panel may yield unpredictable results – we strongly advise going off-line with AudioCore before changing any settings via the RS485 bus.
I’m sure you’re thinking this post is now going to tell you about how reliable our amplifiers are.
How they are designed to the highest standards, mechanically and electrically rugged, bulletproof protection.
Well yes, of course.
But what about external conditions – the things you can’t control?
What about when someone uses too low current a breaker or loads too many amps on a phase and the power keeps tripping?
What about when, despite being told about channel loading, there are still eight subs on that output and the amp overheats?
And what about the totally unforeseeable circumstance of someone tripping over the mains cable?
In all these cases all amplifiers, no matter who manufactures them, will behave the same way – the sound will stop.
And no-one wants silence in the middle of a gig, or the middle of a club night.
But what about the potentially more serious situation of playing out emergency evacuation messages and the amplifier not working?
This is where reliability needs to extend to something outside the box.
Realising that it’s unlikely that the biggest DPA and DNA amplifiers will be used in these applications, we decided to add a little extra backup to
the (current) baby of the ranges by including a deceptively simple way of allowing another amp to automatically take over should the worst happen.
The DPA40 and DNA40 both support automatic backup switching through use of the already built-in output protection relays.
By permitting access to the other pole of the protection relays, if the amplifier loses power, or goes into a protection mode, the relays will disconnect the speakers from the power amplifier channels.
In doing so, they automatically connect the speakers to the Speaker Backup Inputs on the Phoenix connectors on the rear panel:
The outputs of the secondary backup amplifier should be rated the same (so by that we mean use the same amplifier for backup purposes). It’s then just a case of connecting the outputs of the secondary amplifier to the backup inputs of the main amp that has the speakers connected to it. Make sure the two amps are set up the same, with regards to levels, routing, sources etc. and make sure the audio is y-split to both as appropriate.
As important is that the backup amp is on a different supply – be that a UPS or a different ring main so should the worst happen – it won’t also lose power!
All you need is four breakout cables from the secondary amps Speakons wired to four Phoenix connectors (note that the polarity of channels 2&4 inputs is reversed – so these need to be wired up correctly!) and to make sure both amps stay powered at all times.
Should the worst happen, the secondary amp will instantly be connected to your speakers with no intervention required!
So, just how reliable is your amplifier?
Here are the TechNotes, DPA and DNA, to answer that question for you 🙂
Well, if you come to ISE you can find out, can’t you?!
The poor old TechBlog as been neglected in recent times due to the sheer volume of hyper-activity that’s been going on here at XTA, culminating in the release of the killer combo of tech that you’ve been waiting for.
Our world-leading processing reworked for modern connected systems and coupled with the latest power amplifier technology as debuted at last year’s ISE…
as MC2 Audio’s Delta Series, with both DSP enabled models and clever non-DSP models that still have Dante networks as an option with 96k converters.
XTA’s amplifiers that are based on the same leading tech have been designed to be more complimentary to APA, and work in a way that will be familiar to users of our processors. The DPA amplifiers are the processed models with beautiful OLED displays for navigation and showing comprehensive and very helpful input metering in addition to the LED bars that switch modes depending on what you want to monitor or edit – the inputs, the power amp outputs or the independent aux line outputs.
The DPA amplifiers play nicely with APA amplifiers who also are best friends with MC2 Audio’s Delta Series and ALL of them are happy living under AudioCore in the Amped Edition which uses the latest IP connection (or RS485 or USB or even a combo of these!) to realise faster connections and the real time notification of any connection loss, so you can be doubly sure what you set is what you get.
Of course that’s not all that the Amped Edition does that is new…there’s all the new grouping architecture to control and group any combo of outputs or inputs across any amps – lots more on this stuff in the links for Amped Edition info!
The IP connection means seamless migration to a wireless system of control as well – just plug your amps into a router and it’s job done.
DPA and MC2 Audio’s Delta also offer iPad control when connected like this via the free DeltaDirect app – it even recognises the grouping architecture so you can just instantly offline your AudioCore connection and hit OnLine in the app and it’ll find all the amps in seconds!
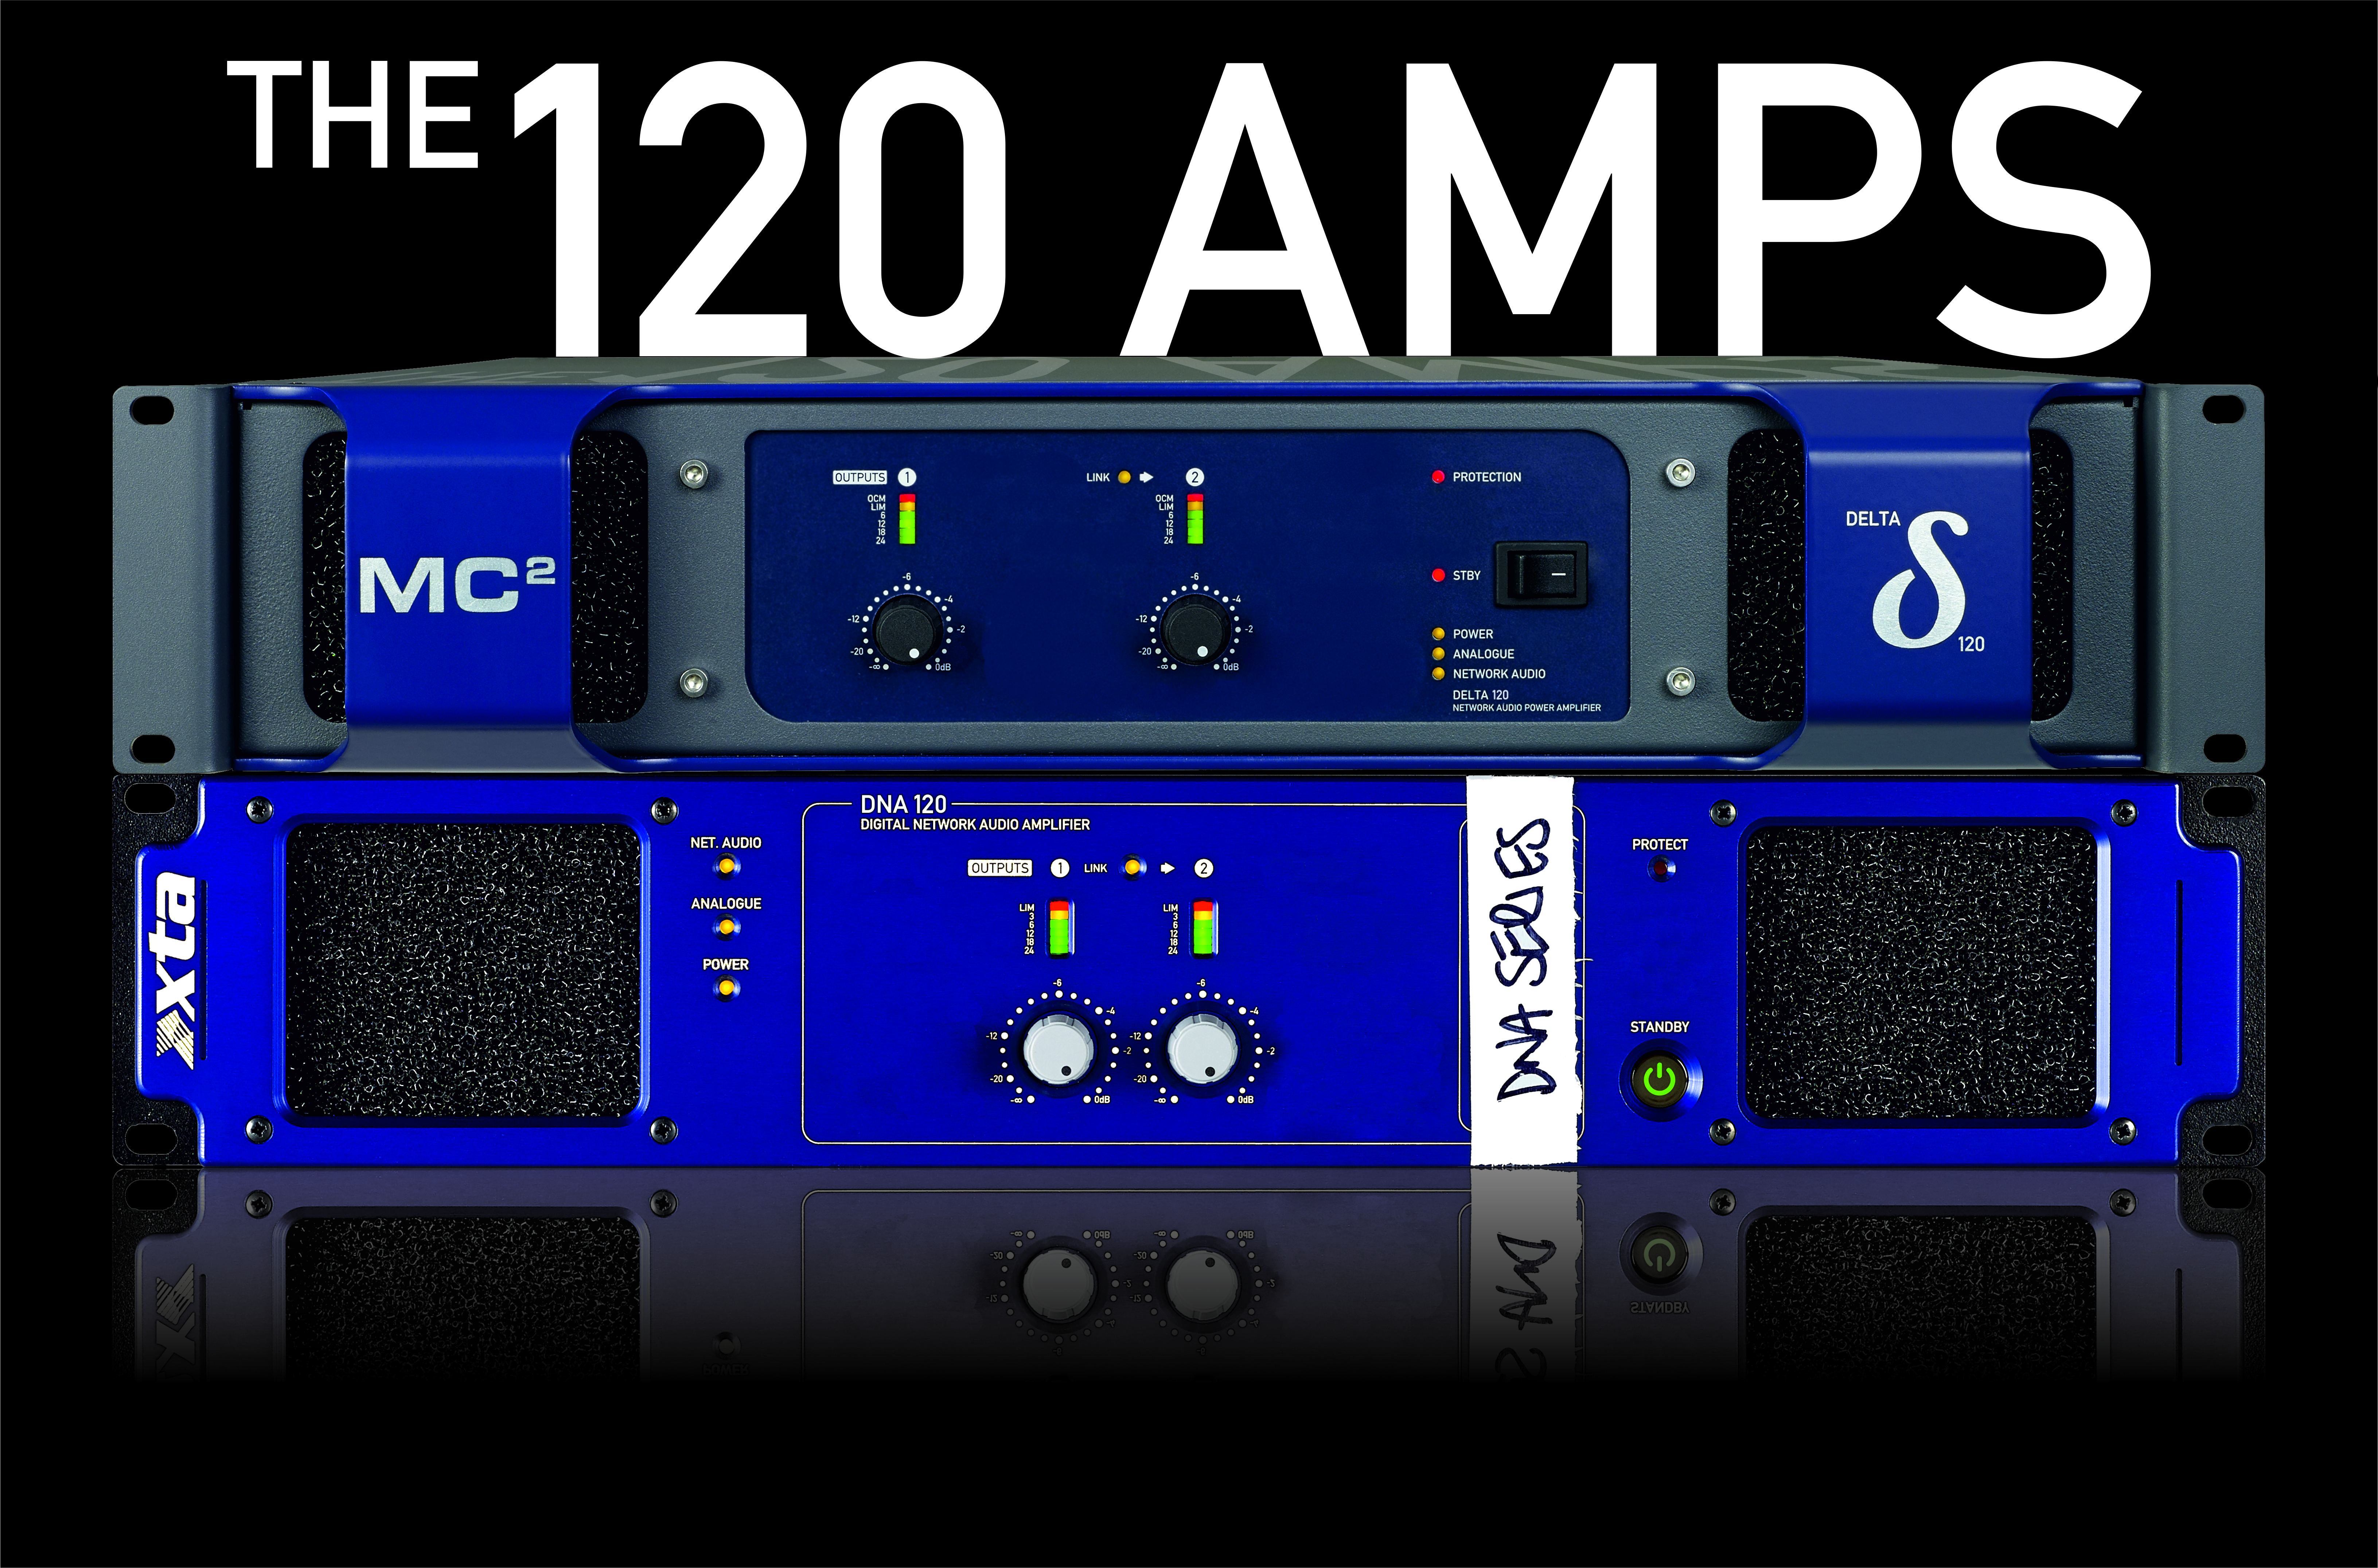
So what about the non-DSP amps? Well, DNA is the XTA offering, based on the same technology but minus the processing. And this leads neatly to the original subject of this post – the 120 Amps. Eventually.
Are these the most powerful two channel amplifiers with networked audio currently available? They might just be…