DPanel-8 – Remote Wall Panel

Introduction

The DPanel-8 is a stand-alone remote panel, operating using the RS485 bus for comms and using either the GPIO port of an MC2 Delta DSP amplifier or XTA DPA amplifier, or an external 5V source for a power supply.

The DPanel-8 is also fitted with an isolated SPDT relay to control external equipment such as projector screens or blind/drape motor systems.

It may be programmed “in situ” whilst plugged into Delta or DPA amplifier, or may be connected directly to a PC (via a suitable RS485 adapter) for programming.  It uses the “simple remote protocol” embedded in the firmware of all Delta DSP or DPA amplifiers and all 4 or 5 Series XTA products, as well as the DC1048 and Ti1048 installation management systems.  Multiple panels may be connected to a system, and the panels can coexist with AudioCore connected via Ethernet or USB.

Capabilities of the DPanel-8

The eight buttons on the panel can be programmed to operate in three “key modes”:

1)  Momentary (used for gain adjustments)

2)  Toggle (used for mutes and standby)

3)  Interlock (used for memory recall)

The “simple remote protocol” allows control of the following functions of an amplifier or processor:

1)  Gain set (absolute setting of any input or output channel’s gain value)

2)  Gain inc/dec (adjust gain in programmable steps relative to current setting, with max/min range capping)

3)  Mute  (any input or output or combination)

4)  System mute (all outputs muted when enabled, restored to original settings when disabled)

5)  Standby (amplifiers only)

6) Memory recall (currently this is only for “Everything” type memories on all amplifiers or processors to ensure compatibility

7)  Relay on/off (isolated relay control on DPanel)

Multiple commands to different devices can be programmed as a macro assigned to a single button.

The DPanel-8 also has an IR sensor and is compatible with many generic IR remote controls, and additional features may be programmed using the IR Remote to extend the capabilities of the panel, or it may be used to replicate the buttons’ functions, on a button-by-button basis.  The panel may also be locked to prevent unwanted tampering (including/excluding IR access).

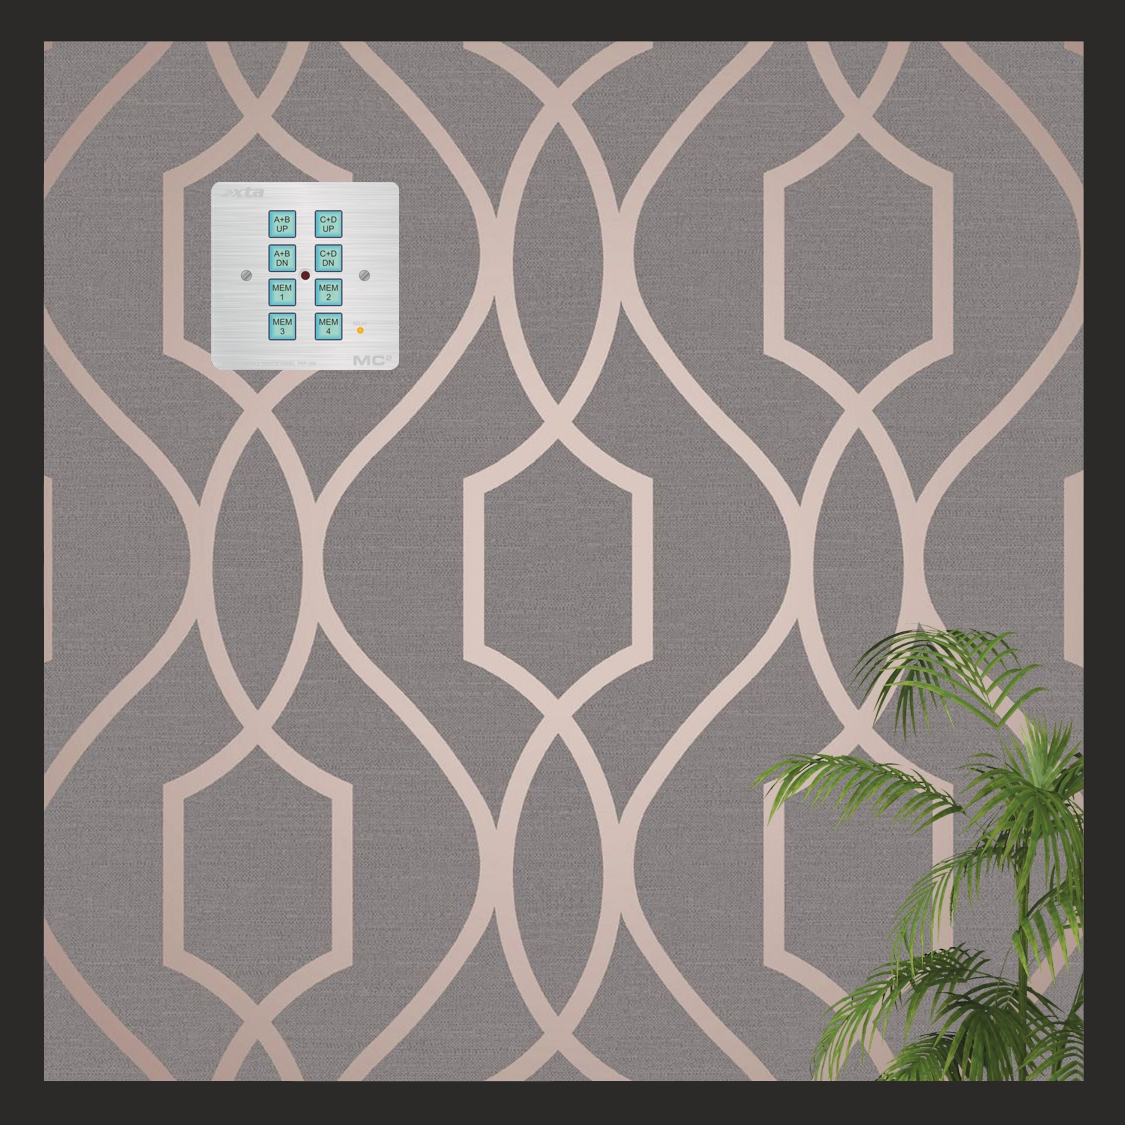
The buttons feature removable caps and are backlit with programmable colour options (cyan/red/magenta) so may be labelled according to their function.  The panel also features additional background illumination for use in low light environments.  The brightness of the backlighting and buttons is also user programmable and the backlighting may be disabled if required.

The panel is designed to fit into a UK single pattress box and may be either surface mounted or embedded into a wall.  The front face is silver brushed 3mm aluminium to blend into any décor.

Full instructions on programming and connecting a DPanel-8 are available here (and also in TechNotes) .

Short-From guide available here.

The remote programming app and loader are available here (and also in TechNotes).


Macro-manage Your Amplifiers.

Back to Basics

As if control from the front panel, from a laptop on USB, or Ethernet, or WiFi, or RS485, OR via DeltaDirect on an iPad wasn’t enough – what if you want to go back to basics?

What if all of that is just too advanced or clever to expect your bar staff or venue owner to cope with?
What if you don’t WANT to let them get into the nuts and bolts of your carefully commissioned and tuned system configuration?

Well, this might just be the answer…

Control of the Important Stuff

Some of you may be aware of the simple remote protocol that is implemented in 4 Series, 5 Series and 1048 processors – a basic set of commands without error checking and complex headers to enable control of day to day adjustments  – input and output gains, mutes, memory recalls…
This works on the RS232 and RS485 ports and is in addition to full remote protocol that AudioCore uses for full two-way control and monitoring.

The simple remote protocol (or SRP as it will be called from now on, or FNO), is one way only (so no settings can be retrieved from the connected unit/units) and allows the following settings to be changed:

– Mutes:  individual inputs or outputs
– Absolute gains:  individual inputs or outputs
– Memory recalls:  depending on how settings are stored these can be input EQ, output EQ, sources (DPA/Delta only) or other processing combinations
– Gain increment/decrement:  adjust individual gains in programmable steps, relative to the unit/units preset gain value (volatile – restored to original values on a power cycle)

There is still scope with each message to address individual units (by model) and also individual device IDs, but there are also global addresses for broadcasting to, for example, all 4 Series,  or all DPA amplifiers, and to use a global ID address.

Play the Eagles again. Or something else modern…

Firmware Support

The latest firmware release for DPA and Delta DSP amplifiers to support the SRP, is 1.26, and this release also incorporates a slight change to the Interface Sub-Menu to accommodate this.  As the only option for using the SRP on these devices is via the RS485 port, this needs to be selected as the comms method of choice.  However, the majority of systems will most likely not be using RS485 as the main comms method – the likelihood is either USB or Ethernet will be in use.

The DPA and Delta DSP amps already have an option to enable RS485 relay mode when using USB or Ethernet as the primary comms method, but the purpose of this is to enable a single point of Ethernet connection to allow multiple amplifiers to be controlled by daisy chaining them on an RS485 “spur” like this:

Ethernet + RS485 relay creating a “spur” of connected amplifiers.

In this scenario, you might think the RS485 being active would allow any commands sent through this port to be interpreted and acted upon.  Due to the complexity of “tunneling” the RS485 data from the Ethernet (or USB) connection, this mode of operation isn’t possible.  However, it is now possible to configure the RS485 port, even when using USB or Ethernet as the main connection, in a mode to enable asynchronous “listening” for simple remote protocol commands.

When using Ethernet, USB, or “Ethernet or USB”, the RS485 Relay option offered in the configuration now has two settings, aside from “OFF”.  The “Relay” option is the same as before and should be used for scenarios as above, where one or more units are to be daisy-chained from the RS485 port of the master unit, for remote control via from AudioCore.

The new “Simple” setting enables the RS485 port to listen for SRP commands, so basic control when off-line can still be active.

AudioCore + SRP via RS485

If all units are to be seen by AudioCore and controllable via RS485 SRP as well, then all units need a direct Ethernet connection in addition to their RS485 bus connections to the wall panel.  Each unit is set to “Ethernet Only” with RS485 Relay set to “Simple” as below:

Ethernet to each amp + RS485 in Simple Mode for SRP control

Simple IS Simple, NOT Relay

As explained above, the “Simple” mode in RS485 Relay means that units daisy-chained on RS485 cannot be seen in AudioCore, set in “RS485 Only” mode as in the above “Spur” scenario.  In the scenario below – only the first unit will be seen by AudioCore as it is in RS485 “Simple Mode” to allow it to respond to the SRP as well as Ethernet traffic.

Simply adding a control panel to the RS485 bus and setting the first device to RS485 Simple Mode will NOT work – only device #1 will be seen by AudioCore.

It is also worth noting that using AudioCore at the same time as issuing remote control commands from a wall panel may yield unpredictable results – we strongly advise going off-line with AudioCore before changing any settings via the RS485 bus.

Download a printable pdf of this Technote here…

AudioCore Mutes and Phase Gangs – Who Knew?

Not that type of gang – we’ve not gone all West Side Story on you…

Whilst checking out something wholly unrelated in AudioCore this very morning, I discovered a neat little feature that I (and I am glad to report no-one else here) knew about when you are working with ganged outputs.

So let’s assume for some reason you’ve ganged the first four outputs on a 448 together like this:

Outs 1-4 ganged. (and Ins A and B, as it happens...)
Outs 1-4 ganged. (and Ins A and B, as it happens…)

If I now go to the gains tab during editing, the gains will be linked and will all track together as expected, and the mutes will remain independent, as they do when operated via the front panel of the unit:

Gains will all be set to the same value and will track together if any of output 1-4 gain is adjusted. All as expected...
Gains will all be set to the same value and will track together if any of output 1-4 gain is adjusted. All as expected…


However…what I didn’t realise is that if I go to the EQ editing tab (where the output tabs for channels 2, 3 and 4 have been amalgamated to a single tab covering 1+2+3+4), there is also a Mute button.  Its behaviour is different – it allows you to mute all the channels in the gang together, whilst leaving the individual mute controls accessible via the gains tab.

This mute button will mute/unmute all channels in the gang simultaneously.


If any channel in the gang is muted, this will show mute enabled – pressing it will set all mutes to the same state – it doesn’t just toggle the states – so if you turn it off here, all four outputs will unmute.

The same holds true of phase controls (always unganged via the front panel), but can be controlled as a gang via this control on the EQ editing tab.

Try it out – Very handy!

It’s funny the things you discover when you think you know it all 😉


Remote control shake-up 2015 – new interface options to make life easier…

Remote control of our units has been built-in and considered since we first developed the DP100, with its options of MIDI, RS232 and RS485 interfaces.
As we always want you to be able to use you equipment no matter what interfaces they support for remote control or connecting peripherals, we try to find solutions that will enable this as simply as possible.

We have overhauled two of our solutions to simplify not only the parts required, but of course to also make things work better!

Firstly, long distance comms for RS485 connections to a PC or laptop.
We have tested many USB to Serial adapters over the years and our recommendation for a simple USB to RS232 adapter still stands – the Aten UC232A.

Aten US-232a
Aten US-232a

This uses an industry standard chip (made by FTDI if you are feeling particularly techhie!) to handle the protocol conversion and this chip (and so its associated drivers) are also used in the DC1048, and the MC2 Ti1048 to provide a direct USB connection.

Our original solution to extending this to RS485 (as RS232 is limited to about 25 feet, although it will run reliably further at lower baud rates) so extending this range to 1000m and allowing a network of units to connect was to add an RS232 to RS485 adapter onto this. The KK Systems K2-ADE adapter worked well for this and so we had a kit consisting of the Aten adapter, the KK Systems adapter, and an D-type to XLR cable converter so you had a USB – RS485 on XLR solution ready to plug straight in.

This KK Systems K2-ADE adapter is added to the Aten adapter to make it a USB-RS485 converter.

Recently, some users have been experiencing difficulties with this solution, especially under Windows 8 – issues with AudioCore not picking up all connected units, or not getting all data back from them successfully. This has turned out to be a Windows serial comms timing issue and beyond our control.
So we looked for a hardware answer to sort this out.

We came up with a new converter that offers a direct USB-RS485 solution in a much more elegant (and cost effective!) manner, and still uses the same reliable chipset as we have been used to.

This adapter will replace the combination above for a more streamlined  elegant solution direct to RS485.
This adapter will replace the combination above for a more streamlined elegant solution direct to RS485 for AudioCore.

Note that this solution is for AudioCore only – we still have a different adapter to work with iCore for control of MC2 Ti Series amplifiers, processors and Dante breakout boxes. iCore does also support 4 Series (and DP548) as well as DC1048s and Ti1048s and so offers an alternative remote platform if you use these together.

This USB-485 adapter is only for use with iCore systems.
This USB-485 adapter is only for use with iCcore systems.

The iCore solution is this KK Systems adapter which again does direct USB-RS485, but due to the fact that the Ti Series products were forced to run at 57600 fixed baud rate (due to having to support Cobranet breakout boxes and their maximum data tunnelling speed), we have to do it slightly differently yet again!

All of this might feel a little confusing but it’s all summarised in the Remote Interface Guide (get it here) along with order codes and what’s supplied with each adapter, and a handy decision tree to help you choose the correct one for you application.

Going Wireless – new Walkabout Kit.

We’ve also been working hard on getting a new “Walkabout Kit” solution together, allowing both wired and wireless Ethernet connection to all units. Some of you have been experiencing problems with the latest DiGi Wisp WiFi to Serial converter – primarily seeing it on your list of available networks. A change in the firmware supplied with the units has unfortunately made them less than ideal to work with due to the fact that once we set them up here, if there are problems “in the field”, resetting them now renders them invisible on WiFi SSID searches, and they need to be manually reconfigured with a serial cable. We realsie this is just not practical in most circumstances. We will no longer supply them.

Instead we have changed to a Moxa NPort wired Ethernet to serial converter. This has several advantages. Firstly, and probably most importantly, upon a hard reset, the device can always be discovered and reconfigured as it has a wired Ethernet connection! Secondly, this solution can “go wireless” simply by plugging into a standard router, making it part of existing networks, instead of being an “ad-hoc” peer-to-peer connection. Lastly, it’s just much better! Set-up in greatly simplified and it’s more robust and reliable. Everything you would want!

Moxa NPort 5150 - a simpler, more reliable solution to Ethernet and Wifi remote connections.
Moxa NPort 5150 – a simpler, more reliable solution to Ethernet and Wifi remote connections.

The Walkabout Kit will no longer include an external USB-WiFi adapter as every device now comes with it built in and the quality has improved to the point that we don’t think it’s necessary to add this extra level of complexity. If you’re interested in finding out more about the Moxa Nport and how we configure it, there’s a guide on-line here which explains all.

AudioCore V8.86 is here – start skipping!

Yes – start skipping! And this is why – there are serious and valuable additions to this latest AudioCore release, but the one thing that will probably be appreciated more than any other is the small addition of this little button:

If you know they're not there, why wait? Tell the computer!
If you know they’re not there, why wait? Tell the computer!

You’ll see it now when you start working on a new system and AudioCore is scanning all IDs to see what’s out there(after choosing to “Build System From Connected Units”):

Once your IDs have been found, hit the button.

Handy.

Even more handy is that AudioCore now supports the DC1048 (and the MC2 Ti1048) for the first time, including the ability to configure and manage the timed presets. We won’t go into all the editing and how that works – it’s basically the same as a DP448 but with the mix matrix mode of the DP548 (instead of fixed level routing).

Remember – if you’re connecting the DCor Ti1048 to the computer via the USB connection, you need to select “Master” as the connection type on the unit, and in AudioCore select “RS232” as the connection type and choose the appropriate COM Port that the USB-Serial device is installed on.

To access the timed presets, it’s a simple right click on the device window, in the same way as you would do to modify the routing or edit input and output names:

Choose "Timed Presets" to edit the automated recall configurations for this device...
Choose “Timed Presets” to edit the automated recall configurations for this device…

This will then display the timed preset manager, where up to 10 events can be scheduled – either as weekly events on certain dyas, or as single one-shot events at a certain time on a certain day.

Set up your memory recall schedules.

Note the “Update to current time” tick box in the bottom left corner – it’s handy to tick this before hitting OK, as it will send you current computer’s clock settings to the unit to make sure its clock is correct – assuming your PC’s one is of course 😉 It’s worth knowing that once a one-shot event has “fired”, then next time you access the timed preset manager, it will have been deleted from the list.

Talking of presets, the ability to load presets from DP448 “.xbl” files (Library Manager files) has been extended to cover the DP548 and the DC1048 and Ti1048.

Presets are loaded on an individual basis through a right click on the Device Window and choice of “Modify Device”:

Just as you would choose to edit names or change routing configurations...
Just as you would choose to edit names or change routing configurations…

On the first tab, you’ll see the “Load Preset” button:

Remember - this will want to find an xbl file - NOT a bin file...
Remember – this will want to find an xbl file – NOT a bin file…

Point AudioCore to a Library Manager file (NOT the output bin file that you would load into the unit – they won’t be recognised!)

We will access the L-Acoustics library file:

…and given a suitable file (it has to be a DP448 file – so a compatible 4 in 8 output device) you will be greeted with a list of all the presets in this file. Pick one and load and you’re done!

Select your chosen preset.

Note that the routing is handled intelligently when loading a fixed routing preset into a DC1048 or Ti1048, and into a DP548 which is currently running in matrix mixer mode. Channel sends will be muted or set to 0dB in accordance to the fixed routing config in the preset. If, when loading into a DP548 the current config is already a “fixed” routing ( so anything other than mix matrix mode), then this mode of operation will be preserved.

For example, the L-Acoustics preset loaded into the DC1048 above (which only operates in mix matrix mode) will have set up the “sends” to work just like a 2 x 4 way system, as you can see below:

This is a stereo 4-way system.

In case you were wondering, presets with summed inputs (such as mono summed outputs for sub drive) are also sympathetically handled: an output fed from A+B for example in a preset, will be imported into a mix matrix with both sends set to -3dB so the output level is summed to 0dB. This is the way the fixed routing has always worked too.

And don’t forget this:

If you know they're not there, why wait? Tell the computer!
If you know they’re not there, why wait? Tell the computer!

United Brands means a whole new PL&S look for 2014!

So another year, another Frankfurt. Or not in the case this year as it was all change for us – the only thing that stayed the same was our position in hall 8.0 at trusty F60. With a change of German distribution from Atlantic Audio to the newly formed company United Brands, they did exactly as it said on the tin: United Brands.

Ourselves and MC2, Martin Audio and DiGiCo, plus of course UB, created (over about 6 months and not without some moments of tension along the way!) a new megastand which allowed all the brands to maintain their identity whilst still feeling part of a group of British companies, complementing each other.

Of the four brands represented by UB, XTA and MC2 probably had the biggest change compared to Martin and DiGiCo, and it was oft remarked that we had stepped up and looked great! Judge for yourselves – there’s a gallery on Facebook.

It was a great show and the new DP544 went down well, adding to it’s stablemate the DP548 to form the 5 Series.

As you’ll see from the photos, the Becks also went down rather well! 🙂

New DP544 – new AudioCore – new firmware!

Following on for the success of our flagship DP548 dynamic management system, and after many requests for a different format of this winning formula, we are expanding the DP548 into the 5 Series and introduce its newest family member, the DP544.

The DP544 includes all the features of the DP548 but now comes in a 4 input – 4 output format.

For all those applications where the main focus is the dynamic EQ, changing the I-O count to four inputs and four outputs makes sense – the DP544 will then fit in perfectly when considered as an in-line processor or insert processor. Imagine the top quality power available when two units are combined with a DS8000D running digitally at 96k directly into a pair of DP544s – superb mic preamps, and a digital signal chain of top quality equalisation and dynamics with remote control!

Coupled with this release, there’s a minor bump up of AudioCore to version 8.85, and an update of all 4 Series firmware to version 2.30 across the board. We’d recommend you update your units if you download the new AudioCore just to ensure you don’t get any comms errors.

Seasonal Gifts from XTA: DC1048 New Firmware and DP548 Live Presets!

Bass bins roasting on an open fire, headphones nipping at your ears…oh yes, it’s the most wonderful time of the year again – it’s Black Friday and Cyber Monday.

Well, when you have finished buying all your presents on-line from the comfort of your sofa, here are a couple of free gifts from us.  Whether your nearest and dearest would be impressed with unwrapping these on the 25th is your call 😉

New DC1048 Firmware

We’ve have had a few instances recently where calls have come in about 1048 units that are not producing any sound.  Meters working, all seems well but no audio.  What might cause this? Mutes on perhaps?  Bongo!  As these units have no visible indication that mutes are enabled and the meters are pre-mute point, if you’ve pressed the System Mute button in iCore and then disconnected the computer there was no way of knowing it was enabled on the unit.

As the system mute is retained on power-down and cannot be switched off by recalling a memory/preset, you could have reasonably been confused.

Well, no longer – turning the System Mute on will now display a message on the default screen in place of the clock/date and if you power up a unit with the system mute on, you get the opportunity to turn it off locally on the unit by pressing OK – no need to plug a computer back in.

We have also added a new GPI mode – ALARM mode.  This changes the functionality of the GPI port slightly as follows.  In ALARM mode, the port is read at power up, to ensure any remotely enabled memory setting is recalled, and if no connections are applied to the port, memory 1 will recall.

This is to allow for situations where the unit not only has to select between possible mute/unmute scenarios for voice EVAC systems, but also perform another (different) recall if the GPI plug is disconnected.

This firmware is available for both DC1048 and Ti1048 online in the zip file, along with the loader program – remember it’s a single version for both Ti and DC versions.  Get it here.

DP548 Live Presets

Meanwhile, XTATV Studios have been busy preparing the first of the Live Presets, showing you some of the more interesting uses for the Dynamic EQ bands that are available in the DP548.
Mention “Dynamic EQ” and what springs to mind initially is quite traditional “corrective” uses such as De-Essing or De-Popping, which can, of course, be accomplished very easily.

However, as the DEQ available in the unit have a few more tricks up their sleeve, other dynamic control that you might not have thought of can be achieved.

For example – used on inserts – a couple of  bands can be pressed into full range service, one in boost below more and one in cut above mode to create a window of gain control and so a “levelling” function.

As the bands can also work as shelving filters, you can set two as high and low shelving EQ , and make them boost below a threshold – instant (but dynamically adapting) loudness compensation.

There are more to come, but have a look and listen to these two – and don’t say we never give you anything!

Happy Christmas!


Downton Abbey, Strictly, X Factor or XTATV?

You made the right choice – be informed as well as entertained, and spend a few minutes watching XTATV’s latest output all about the DP548 Dynamic Audio Management what makes it much more than a DP448 with purple buttons.

If any of you have wanted to get hold of a Series 2 Dynamic EQ or Comp, and feel like you missed the boat (well, you did – that ship sailed some time ago – and finding one second hand is not an easy task!), all is not lost.

There are 4 channels’ worth of D2 multiband dynamics, and 8 channels’ worth of C2 compression added to the already extensive DP448 lineup, AND your DP448 presets will work in this too…

Watch the video and look forward to our DEQ in action clips coming along shortly…


DC1048 and 4 Series Firmware Update Adds Crucial Inc/Dec Gain Control

Not the pithiest title there, but one that is easily searchable…even through the blizzard conditions here at XTA this morning!
OK so currently that might be  a slight exaggeration, but it’s coming down thick and fast now and the offices may well be deserted by lunchtime 😉

Snowy view from  the office window over the river this morning...
Snowy view from the office window over the river this morning…

Bundled in with the FIR filtering additions to the 4 Series, we have added some very useful remote functionality to the range, and this has also been included in DC1048 firmware.  If any of you have used Crestron systems (or similar)  or had reason to need remote control of our gear outside AudioCore or iCore, we added (some years ago now) a layer of simple remote control protocol to give basic adjustment of key parameters, without the “framing and packeting” that the full remote access requires.

This simple system allows changes to input and output gains, mutes, and memory recalls.  The only slight flaw in this approach was that the gain adjustments were all absolute so, unless you were prepared to start from a known gain value and overwrite the current setting(s) in a unit, gain controls remotely could cause jumps in level.  This is not peculiar to our units – it is just a consequence of “blind” remote access (same thing would occur with for example MIDI control – any system where the starting point (current value) of a control has not been queried or cannot be determined.

Obviously AudioCore’s full protocol queries a unit for all its settings so adjustments made are from a known starting point, but this simple system is “one-way” and so cannot get the settings first.

To circumvent this problem, we have added (not replaced  – absolute gain settings are still possible) an increment/decrement command to the simple protocol that allows adjustments to be trimmed about the current value of any channel, with step size and limits also available.

There’s no need for this post to go into the details of how it works as it’s all in a TechNote on the website  here

This  document replaces the previous one and expands greatly on how to construct the simple messages so even if you don’t need the new facility, it might be worth checking it out if you need to work out how to recall a preset remotely for example…

So just to be clear – this protcol enhancement has been added to all 4 Series in Version 2.20, and to the DC1048 in version 1.20 (and the MC2 version, the Ti1048).

A couple of nice little extras have also gone into the DC1048 – there is now an extra step in the LED Timeout parameter – choose for the button LEDs and LCD backlight to stay on for 5 to 90 seconds (as before) or choose “Off”  – this leaves all the lights on permanently.

This was added after some customer comments that they loved the way the LEDs and backlight faded up and down when the unit was accessed, but when the lights went off, in the absence of any audio (no if no meters showing), it was hard to tell  from  a distance if the device was actually powered up!

Also added is a virtual “COMMS” LED in the form of  the LCD backlight.  Now (assuming the LED Timeout hasn’t been set to its new “Off” position!) if the unit is accessed remotely, the LCD backlight will fade up for 5 seconds to show it’s been addressed.  If you have more than one unit, you’ll be able to see if any aren’t responding on the network – no backlight on!

All firmware is available to download in a zip file, bundled with the loader app here

Now I’m off for a snowball fight in the car park!

WP_000967